Thursday, December 29, 2011

Fabric

Apologies for this photo, the lighting is all 'off' .... Sarah stole my (sorry, BORROWED) my Ott Lite to do some sketching and it hasn't made its way back to my craft room! Anyway, the lighting is awful, BUT, I wanted to show you how to use fabric on a card. This Scottie dog is from some fabric I found in England when I was with my sister, I ironed some interfacing onto the back to make it stiff and to stop the fraying, then I cut out the Scottie. Mono Multi glue seems to have stuck him down to the Vanilla Cardstock nicely. This one is going to my friend who lost her dog over Christmas. So sad :(


Here's a better pic of the fabric. Cute isn't he? 


Carstock is Very Vanilla and Pool Party and the sentiment is stamped in Rose Red to bring out the red roses on the fabric.

Wednesday, December 28, 2011

A Few Thank Yous

Had fun yesterday stamping with some very good friends ~ I need thank yous after receiving some fabulous Christmas presents! Here are a couple of designs using Stampin' Up products soon-to-be-available from the Occasions Mini :)


Recipe
Stamps : Tea Shoppe, Apothecary Art
Ink : Versamark, Pool Party, Black StazOn
Cardstock : Shimmery White, Pool Party, Watercolour Paper, Blushing Bride
Accessories : Big Shot, Framelits, Modern Label Punch, 1/2 Pearls, White EP, Heat Gun

Saturday, December 17, 2011

Travel Kleenex Tutorial

Thanks to my good friend, Lisa W, for helping me link the TUTORIAL for my travel tissue pouch. It's at the sidebar, just click and it will take you straight to the directions :)

Friday, December 16, 2011

December Club

A quick post today. Tonight and tomorrow are my 2 Stampin' Up Clubs and these are our projects. The card uses the Holiday Mini set, 'you are loved'. It's delightful, I'm really hoping it makes it to the Big Catty in 2012. We made this card at Regionals and I thought my girls would enjoy it. The reindeer tag (or bookmark) is based on my friend, Dawn Marie's, scrapbook page. Thanks Hottie for showing me how to make them ;) And the final project is one of my Kleenex travel tissue pouches :) Tutorial will be up this weekend!


Tuesday, December 13, 2011

Kleenex Travel Pouch

I was out shopping with Mum when she was visiting, and we bought a multi-pack of Kleenex travel tissues for Dad's flight home. We gave him his one packet, and left the others down in the basement .... waste not want not. Why not prettify them and give them out as Christmas Presents?

I started with this prototype ....


 ... and ended up with this!


I'm working on a tutorial, it'll be linked in the side-bar and, once again, free of charge :) I'm never going to make any money at this game!!!! But I hope you enjoy making yours, and leave me a link so I can come and see what you did. Thanks and Merry Christmas!

Monday, December 5, 2011

Bright Hopes & a Button Challenge

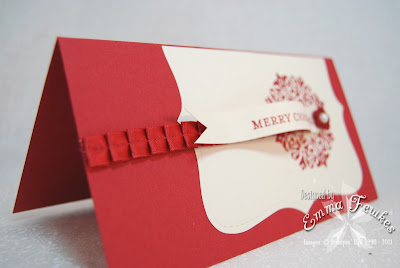
Here's my card for today. I managed to squeeze in today's 'Technique Lover's Challenge' over on SCS. We were to make a holiday card using buttons. I just used one, wanted to keep it simple. Also couldn't resist using the new ruffled ribbon. Isn't it lovely? It's from the soon to be released Occasions Mini catalogue. Love it!

Recipe
Stamps : Bright Hopes
Cardstock : Riding Hood Red, Very Vanilla
Ink : Versamark
Accessories : Cherry Cobbler Embossing Powder, Heat Gun, RHR Pleated Ribbon, Button, 1/2 Pearl

Sunday, December 4, 2011

Send Me Soaring

Here's a new set from the 'soon to come' Occasions Mini. Nice and simple, just like me :) It's called Send Me Soaring, I love it's simplicity, this one's going to one of my Besties who's having a rough time right now.


Here's a closer look at the kites:


Recipe
Stamps : Send Me Soaring
Ink : Soft Suede, Perfect Plum, Marina Mist, Riding Hood Red
Cardstock : Shimmery White, RHR, Marina Mist, Lucky Limeade
Accessories : Adorning Accents EF, Fashionable Hearts Embosslits, Big Shot

Friday, December 2, 2011

Mum's Card

Mum wanted to make a 'special' card for her sister's birthday, she's going to be 70. She used a new set, Apothecary Art, along with the new Framelits. How gorgeous is this? The 70 is die cut from Glimmer Paper and the background uses some scoring ... wowsers! Great card, Mum!

Occasions Mini Sneak Peak


When you've had a crappy day, nothing beats sitting down with a box of new Stampin' Up goodies and getting inky! This card has lots of new things which will be available shortly in the Occasions Mini Catalogue. The stamp set is called Bordering on Romance, and it has coordinating stamps with the new Edgelits Dies. I LOVE THEM! So easy to use and perfect for a little accent on the edge of a card. Can you see the new hatpin too? Cute! And that ribbon? It's gorgeous .... can't wait to make more!!!

Recipe
Stamps : Bordering on Romance, Tiny Tags
Ink : Poppy Parade, StazOn Black
Cardstock : Shimmery White, Poppy Parade, Twitterpated DSP
Accessories : Hatpin, Circles #2 Die, Large Scallop Circle Punch, Tag Punch, 1/2 Crystals, Pleated Ribbon, Blender Pen & Reinkers

Wednesday, November 30, 2011

Birthday Cupcakes

I needed some birthday cards so thought I'd pull out the 'Create a Cupcake' set and coordinating punch. I went looking for inspiration in the SCS galleries and thought I'd take the basic idea of this card. I took the basic layout and put my spin on it. I played around with DSP and settled on these 2 designs.


Here are more pics showing the subtle differences ...

Recipe
Stamps : Create a Cupcake
Ink : So Saffron, Perfect Plum, Baja Breeze, Pear Pizzazz
Cardstock : Shimmery White, Perfect Plum, Subtles DSP
Accessories : 2 3/8" Circle Scallop Punch, Circles #2 Die & Big Shot, Circle Scissor Plus, 1/2 Crystals, Texture Plate, White Gel Pen

Friday, November 25, 2011

Christmas Berries

Making different colour-ways with the same stamp (from Easy Events). The image on a coloured cardstock uses the 'Black Magic' technique per the fabulous Karen Barber!


Thanksgiving and a New Baby


I hope your Thanksgiving Day was wonderful, ours was. We were invited out for a traditional American Thanksgiving Day Meal (thank you Wiersing Family). It was wonderful, we THOROUGHLY enjoyed the company and the food and I wish we could eat like that EVERY day! This is the card I made for LeAnne and Jeff, nothing too difficult or fancy, but they loved it.

I also made this card for my cousin Antonia who gave birth to the newest member of our family last week, Sebastian Frederick Alexander Close. This card is a total copy of the one in the Idea Book & Catalog, with my spin on it. It was fiddly to make, but I LOVE it!

Friday, November 18, 2011

November Club

It's my November Club this weekend. These are our projects. The small 'Triple Treat Flower' project is a pull-out 2012 Calendar to keep in your handbag. The 2 cards were inspired by fellow bloggers, the hot air balloons by Darlene and the Vintage Skates by Judy Marshall.

Tuesday, November 15, 2011

Today's colour challenge over on Splitcoast was to use Lucky Limeade, Calypso Coral and Baja Breeze. These colours don't scream 'Christmas', but I think I pulled it off. My mum's staying and, as she so politely put it, "It's lovely, but I wouldn't choose it" ... hee hee. That's English for "I don't like this one" ...

Recipe
Stamps : Christmas Postcard
Ink : StazOn Black
Cardstock : Watercolour Paper, Naturals Ivory, Calypso Coral, Lucky Limeade, Baja Breeze
Accessories : Lucky Limeade Ruffled Ribbon, 1/2 Pearls, Dotted Scallop Ribbon Punch, Blender Pens & Reinkers

Sunday, November 13, 2011


Mum & I spent a happy afternoon in the new basement stamping! We stumbled across this blog by 'Darlene' who just does AMAZING WORK!!! I absolutely 100% copied the hot air balloon card ... loved it! And then I followed a tutorial on how to make SU Markers look like Copics. Enjoyed EVERY second of it today. Mum did some great work too!

A Basement Facelift

Here's my messy basement before my Dad arrived to give me a makeover! What a MESS :)

Here we are constructing the IKEA kitchen cabinets. So easy to put together, and not horrendously expensive.
It took us 3 days to get everything finished ~ Dad can make anything!!! A few trips to Home Depot for 'emergency' supplies, like the 2" hole cutter drill bit which wouldn't fit into our drill! Had to buy a bigger drill just to make that one hole. Worth it though, now all my electrical wires come up through one point on the desk ... so neat and clever!

Here I am with Mummy making use of the new space. I'll show you what we made in my next post!